Install LAMP Server on Ubuntu?
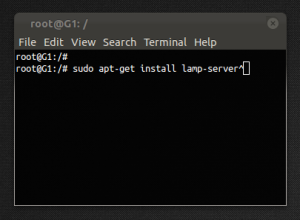
A few complex packages but all (bar linux!) can be installed with one command and then following the on-screen instructions:
(NOTE: All the commands here need to be typed into a terminal, open one by pressing Ctrl+Alt+T.)
|
1 |
sudo apt–get install lamp–server^ |
It’s important to remember the caret (^) at the end of the command.
Thought I’d get that out the way for all the hit and runners looking for the command!
WARNING!
The use of ^ in the package name suggests that this is a ‘meta-package’. Meaning a number of programs that are usually installed together.
If you try to remove this ‘meta-package’ you could remove a lot of programs you are not expecting to… SSH being one of them!
So please do install your lamp server using these instructions, but do not remove it using lamp-server^
Let’s proceed……
What is LAMP Server
LAMP Server is a collection of open source software used to create a web server. The collection consists of:
- Linux – the operating system
- Apache server – the server
- MySQL – the database system
- PHP – the programming language
Clearly named after the initials of its components, these four applications are all lengthy subjects in their own right. So I won’t go much further on them, but if you have any questions post a comment and I’ll always try help.
Installing Lamp Server components individually
Installing Linux
Installing Linux unfortunately isn’t as simple as one command. But installing Ubuntu is as simple as installing any other operating system. The latest installation .iso can be downloaded here. Ubuntu isn’t the only version of Linux, a list of major distributions can be found at distrowatch.
Installing Apache Server
Apache Server can be installed in one line:
|
1 |
sudo apt–get install apache2 |
You can test the installation by visiting http://localhost/ in a browser, you should see a massage saying “It works!“.
Installing MySQL Server
Installing MySQL is as simple as another one line in the terminal:
|
1 |
apt–get install mysql–server mysql–client |
This installs:
- MySQL Server – to store/serve your database
- MySQL Client – a client to access your MySQL server
Be sure to pay attention during the install. You will be asked to create a password for the MySQL root user. You can then access the server in the terminal by typing/copying:
|
1 |
mysql –uroot –ppassword |
Obviously replace ‘password‘ with the password you just created (leave the ‘-u‘ and ‘-p‘ before your username and password). You should now be logged in and be displaying ‘mysql>‘ on your command line ready for your SQL queries!
Installing PHP
PHP requires 3 packages to be installed, again its only one line:
|
1 |
sudo apt–get install php5 libapache2–mod–php5 php5–mysql |
You must restart your Apache server now for the changes to take effect:
|
1 |
sudo service apache2 restart |
To test this, open gedit and type/copy:
|
1 2 3 |
<?php phpinfo(); ?> |
Save the file as info.php. Now navigate to this file in your web browser by visiting http://localhost/info.php, you should see a page displaying your PHP version and the rest of your PHP installation information.
Done!
You have now installed a LAMP server on Ubuntu! You are now ready to serve web-apps with server side scripting and MySQL database access. There are other features to configure that we may go into in later articles, but for now drop me a comment if you have any questions or need any help.

Pingback: LAMP server – installing via tasksel or apt-get ?()